How to Change an Uncuffed Tracheostomy (Trach) Tube
What is an uncuffed tracheostomy (trach) tube?
A tracheostomy (trach) is a small opening that goes through the front of the neck into the windpipe (trachea). This opening helps a person breathe if their airway (breathing passage) has been narrowed or blocked. The opening in the skin over the windpipe is called a stoma. A small plastic tube called a trach tube is placed through the stoma to help the person breathe.
This tube can be cuffed or uncuffed:
- A cuffed trach tube has an inflatable cuff around it. The cuff creates a seal to prevent air leaks. It keeps food, liquid, or other materials from entering the airway or lungs.
- An uncuffed trach tube does not have an inflatable cuff.
Uncuffed tracheostomy (trach) tubes need to be changed regularly. Your child’s respiratory therapist will tell you how often.
You might also need to change the trach tube during an emergency. This might occur when suctioning does not clear the tube and your child struggles to get air in and out. Suctioning is a process to remove mucus from the trach so that your child can breathe easier.
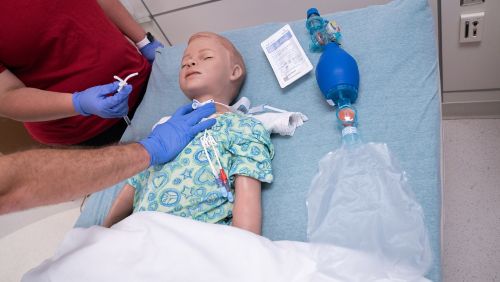
Always use 2 caregivers when changing your child’s trach tube unless it is an emergency.
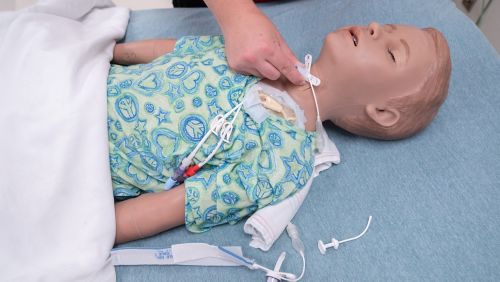
You can change the trach tube at the same time you clean the stoma and change trach ties. Trach ties are bands that go around the neck to hold the trach tube in place.
Always follow the instructions given by your respiratory therapist.
Supplies needed to change an uncuffed trach tube
- Suction kit (contains sterile catheter and sterile gloves)
- Suction machine
- Towel roll
- New (clean) trach tube
- Trach ties
- Sterile water
- Water-soluble lubricant (optional)
- Emergency trach supplies; keep emergency supplies available at all times
- 2 caregivers
Prepare to change the uncuffed trach tube
- Both caregivers must clean their hands with soap and water or use an alcohol-based hand sanitizer.
- Gather and prepare supplies. Always keep emergency supplies within your reach when doing routine trach care.
- Attach new trach ties to the new trach tube. Be careful not to touch the end of the tube that will go into your child’s stoma.
- Dip the end of the trach tube that will go into the stoma in sterile water. Then, place it back in the trach package. You could also use water-soluble lubricant instead of sterile water.
- Your child may need suctioning before changing the trach to help prevent coughing. Learn how to suction a tracheostomy.
- Position your child safely lying down where both caregivers can view and reach the trach and neck area. You can place a towel roll under your child’s shoulders to make it easier to see the trach site.
Remove the old uncuffed trach tube
- The primary caregiver will hold the new trach with the obturator in place at the hub. An obturator is the part of the device that helps guide the trach tube in the airway.
- The secondary caregiver will use 1 hand to hold the old trach in place while using the other hand to undo the trach ties.
- The primary caregiver will count to 3. When the primary caregiver says 3, the secondary caregiver will remove the old trach.
Place the new uncuffed trach tube
- In a quick arched forward motion, the primary caregiver will insert the new trach into the stoma. Remove the obturator right away.
- Look, listen, and feel for air moving in and out of your child’s trach. If required, place your child back on oxygen supply or ventilator at this time.
- The primary caregiver will continue to hold the trach in place.
- While keeping control of the new trach and the patient’s head, the primary caregiver will lift the head and neck. Then, the secondary caregiver will secure the trach ties together.
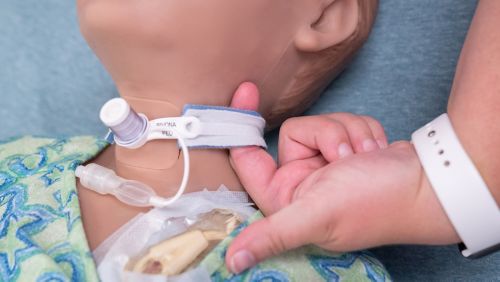
- The primary caregiver should not let go of the trach until making sure the trach ties are not too tight or too loose. One finger should fit between the trach tie and the neck.
After any trach change, watch your child closely for several minutes. Look for any breathing problems or skin color change.
When to call your care team
Call your care team if:
- The mucus smells foul
- Your child looks ill
- You have questions about changing the uncuffed trach
Key points about changing an uncuffed trach tube
- You must change an uncuffed trach tube regularly.
- Always use 2 caregivers when changing an uncuffed trach tube.
- Follow the process the respiratory therapists taught you to change an uncuffed trach tube.
- Call your child’s respiratory therapist if you have questions about changing an uncuffed trach tube.


